How To Create Apache Virtual Host in Ubuntu

Summary
Before Create Apache Virtual Host files, we need to check in your system whether Apache Server installed or not. If it is installed no need to anything. If it is not installed type the following commands.
1
2
sudo apt-get update
sudo apt-get install apache2
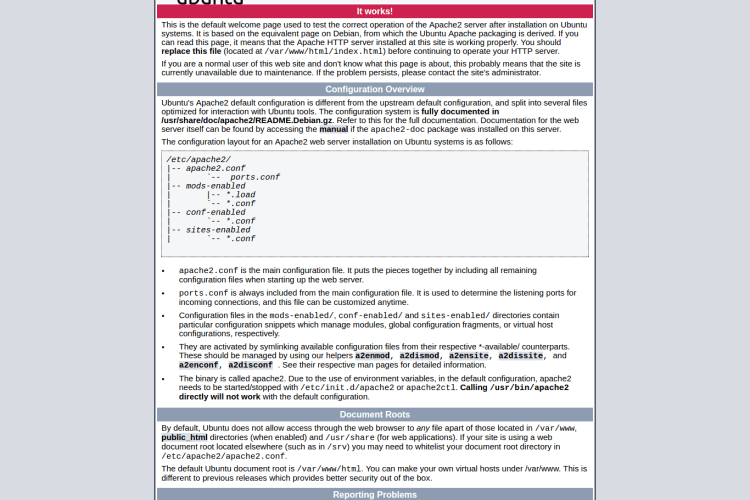
After installing Apache Server, Let’s test whether the web server is working properly or not by navigating to the URL http://ip-address/ or http://localhost/. It will open Apache Ubuntu Default Page.
Create a Virtual Directories
Create a directory in root folder (ie. public_html folder)
1
2
3
cd /var/www/html/
sudo mkdir dev1.techpulsetoday.com
sudo mkdir dev2.techpulsetoday.com
Create a Demo Pages
Create an index.html file in nano or vim editor by typing,
1
sudo nano dev1.techpulsetoday.com/index.html
1
<h1>Good! dev1.techpulsetoday.com Virtual Host is Working fine!</h1>
Do the same thing for Virtual Host Directory 2
1
sudo nano dev2.techpulsetoday.com/index.html
1
<h1>Good! dev2.techpulsetoday.com Virtual Host is Working fine!</h1>
Give the Proper Ownership and Permissions
Navigate to corresponding Virtual Host Directory and then run the below commands.
ie. cd /var/www/html/dev1.techpulsetoday.com/ and cd /var/www/html/dev2.techpulsetoday.com/
1
2
3
sudo chown www-data:www-data -R *
sudo find . -type d -exec chmod 755 {} \;
sudo find . -type f -exec chmod 644 {} \;
Create Virtual Host Files
By default, Apache comes with a default virtual host file called 000-default.conf. We will copy the 000-default.conf file contents or Create a new Virtual Host files.
1
2
3
4
5
6
vijayan@vijayan-VPCCA35FA:/var/www/html/dev1.techpulsetoday.com$ cd /etc/apache2/sites-available/
vijayan@vijayan-VPCCA35FA:/etc/apache2/sites-available$ pwd
/etc/apache2/sites-available
vijayan@vijayan-VPCCA35FA:/etc/apache2/sites-available$ ls
000-default.conf
vijayan@vijayan-VPCCA35FA:/etc/apache2/sites-available$
Now you are in this location -> /etc/apache2/sites-available
1
2
sudo touch dev1.techpulsetoday.com.conf
sudo touch dev2.techpulsetoday.com.conf
Make sure the Virtual Host files contains .conf extension at the end.
Now open dev1.techpulsetoday.com.conf, nano or vim editor by typing
1
sudo nano dev1.techpulsetoday.com.conf
Copy paste bellow code.
1
2
3
4
5
6
7
8
9
10
11
12
13
<VirtualHost *:80>
        ServerName dev1.techpulsetoday.com
        ServerAlias www.dev1.techpulsetoday.com
        ServerAdmin vijayan@techpulsetoday.com
        DocumentRoot /var/www/html/dev1.techpulsetoday.com
<Directory "/var/www/html/dev1.techpulsetoday.com">
    AllowOverride All
    Order allow,deny
    Allow from all
</Directory>
        ErrorLog ${APACHE_LOG_DIR}/error.log
        CustomLog ${APACHE_LOG_DIR}/access.log combined
</VirtualHost>
Likewise, open dev2.techpulsetoday.com.conf, nano or vim editor by typing
1
sudo nano dev2.techpulsetoday.com.conf
Copy paste bellow code.
1
2
3
4
5
6
7
8
9
10
11
12
13
<VirtualHost *:80>
        ServerName dev2.techpulsetoday.com
        ServerAlias www.dev2.techpulsetoday.com
        ServerAdmin vijayan@techpulsetoday.com
        DocumentRoot /var/www/html/dev2.techpulsetoday.com
<Directory "/var/www/html/dev2.techpulsetoday.com">
    AllowOverride All
    Order allow,deny
    Allow from all
</Directory>
        ErrorLog ${APACHE_LOG_DIR}/error.log
        CustomLog ${APACHE_LOG_DIR}/access.log combined
</VirtualHost>
Check Virtual Host Configuration Syntax
To check configuration files for syntax errors:
1
2
3
4
5
6
7
8
# Fedora, RHEL, CentOS, OSX
httpd -t

# Debian, Ubuntu
apache2ctl -t

# MacOS
apachectl -t
To list all Virtual Hosts and their locations:
1
2
3
4
5
6
7
8
# Fedora, RHEL, CentOS, OSX
httpd -S

# Debian, Ubuntu
apache2ctl -S

# MacOS
apachectl -S
Enable the Newly Created Virtual Host Files
1
2
sudo a2ensite dev1.techpulsetoday.com.conf
sudo a2ensite dev2.techpulsetoday.com.conf
After Enabling Virtual Host, you need to restart Apache Server.
1
2
3
4
5
# In Ubuntu 15.10/15.04:
sudo systemctl restart apache2

# In Ubuntu 14.10 and earlier versions:
sudo service apache2 restart
Setup Local Host Files
Edit file, /etc/hosts,
1
sudo nano /etc/hosts
Add the Virtual Domain Names one by one as shown below
1
2
3
4
5
#####################################
# Virtual Host
#####################################
127.0.1.1       dev1.techpulsetoday.com
127.0.1.1       dev2.techpulsetoday.com
restart your apache if require.
Test your Results
Open your browser and type URL http://dev1.techpulsetoday.com/ and http://dev2.techpulsetoday.com/
dev1.techpulsetoday.com Page

dev2.techpulsetoday.com Page

If both of these sites work, you’ve successfully configured two Virtual Hosts on the same Server.

 Never miss a
story from us, subscribe to our newsletter